Basic Usage
Background
The user interface for the system is built using the Jupyter Widgets interactive browser controls for Jupyter notebooks, using voila to render the notebook as a web application. More details on this can be found in the reference/software section.
This automatically launches within the web browser, presenting the user interface on the touchscreen display.
User Interface
The user interface is presented as a series of navigable tabs, which are accessed by the tab bar at the top.

Each tab provides a different set of widgets for either controlling or configuring the system.
Main tab
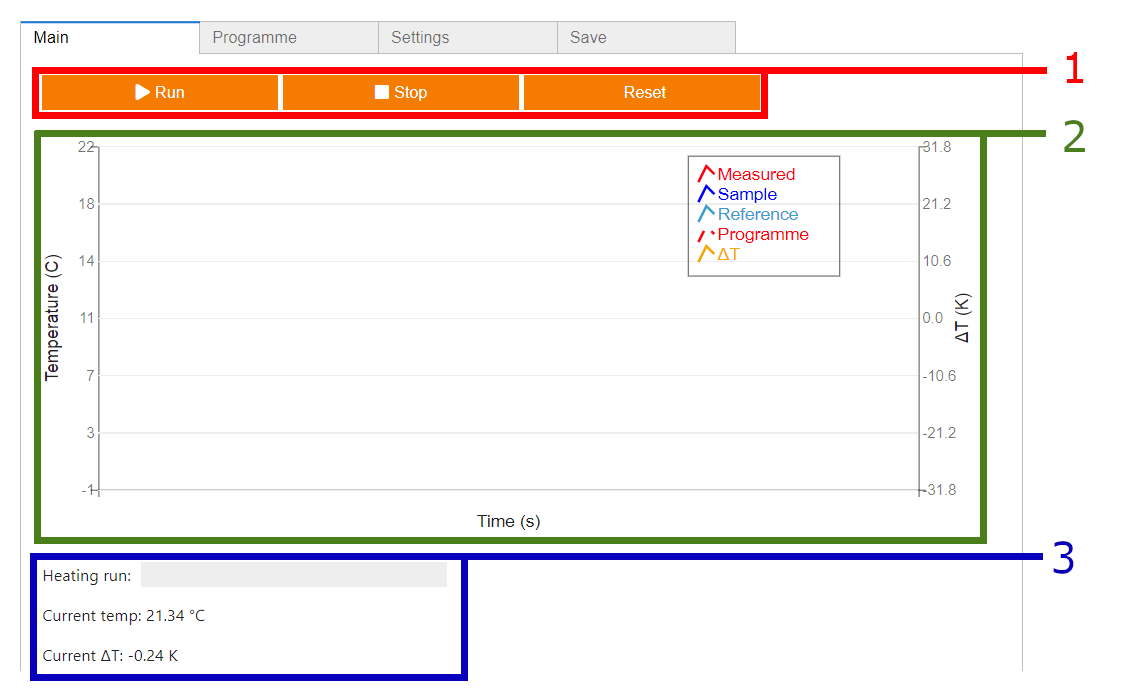
The main tab features the following user interface elements:
The control bar, which is used for initiating and (manually) stopping heating runs, as well as clearing any currently saved data and the current heating programme.
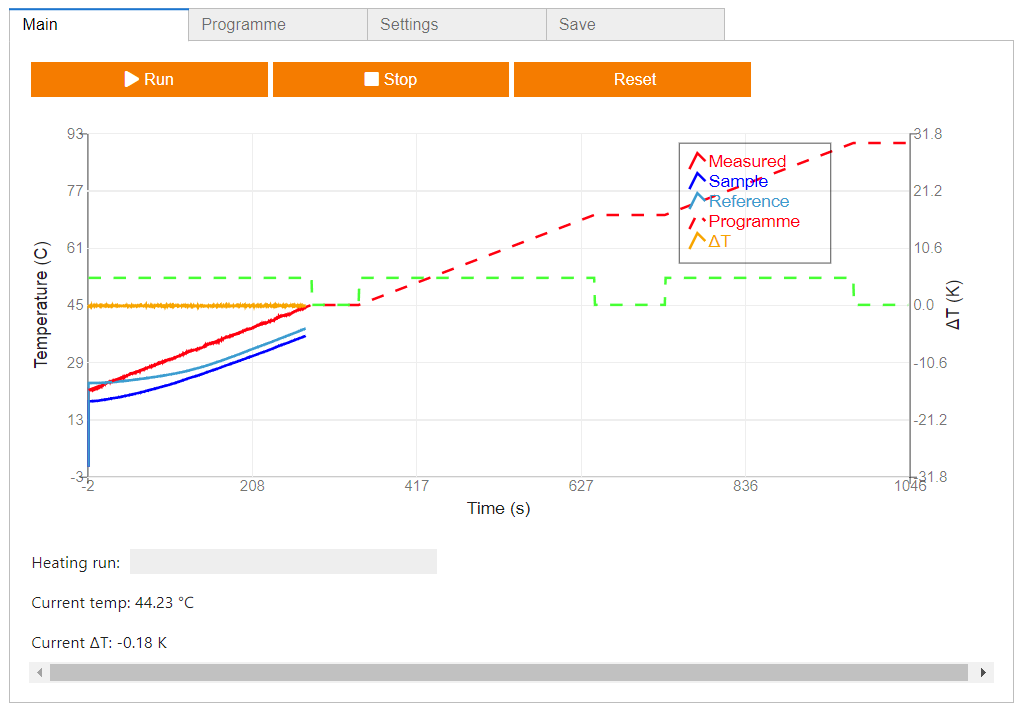
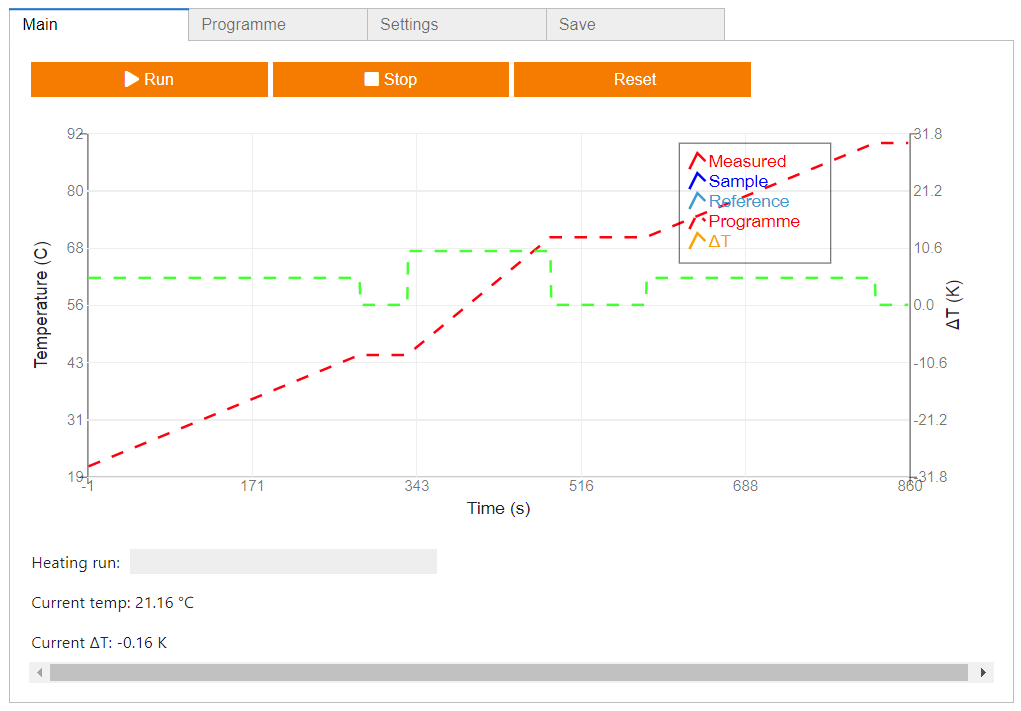
The graph figure, which is used to display a preview of the entered heating programme, as well as the temperature profile of the temperature sensors when a heating run is in progress.
The status bar, which features a real-time readout of the system temperature, as well as the progress of an active heating run.
Programme tab
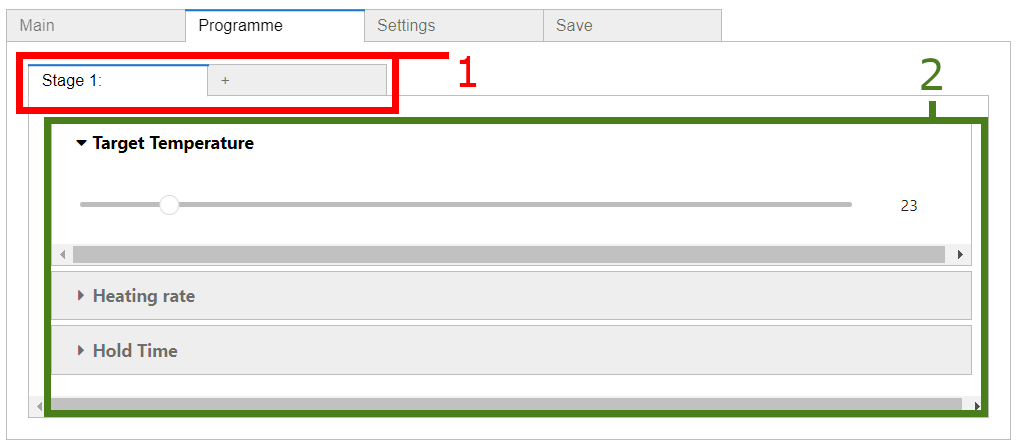
The programme tab features the following user interface elements:
List of programme stages. Additional stages can be added by clicking the ‘+’ button.
Adjustable sliders for the selected stage’s parameters
A given heating run programme consists of a number of heating stages, each of which are defined by a target temperature, heating rate and hold time. Each stage consists of:
A heating ramp, starting from the previous stage’s target temperature, till the current stage’s target temperature is reached. This proceeds at the specified heating rate.
A hold period, where the temperature is maintained at the target temperature for the hold time.
After setting up a heating programme, a preview of the programme is displayed in the graph figure of the main tab.
Settings tab
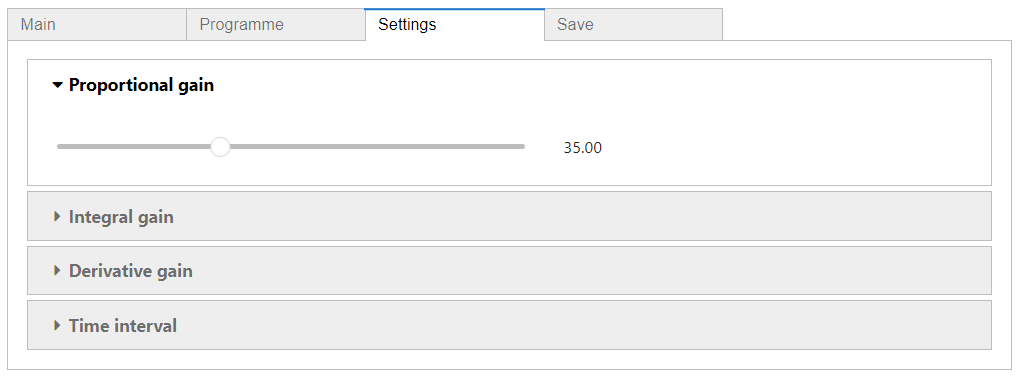
The settings tab features a number of drop-down sliders, for setting The following system parameters:
PID tuning parameters for the temperature control loop. The temperature control loop is implemented using a PID controller, the parameters of which can be tuned here, to achieve the desired temperature response. The ideal values of the parameters will vary, depending on the details of the thermal setup of the system, such as the current-voltage response of the thermoelectric module used.
The microcontroller tick rate. This is the rate at which the temperature sensors are sampled, and the PID controller updated. The default value of 0.25s is recommended.
Export tab
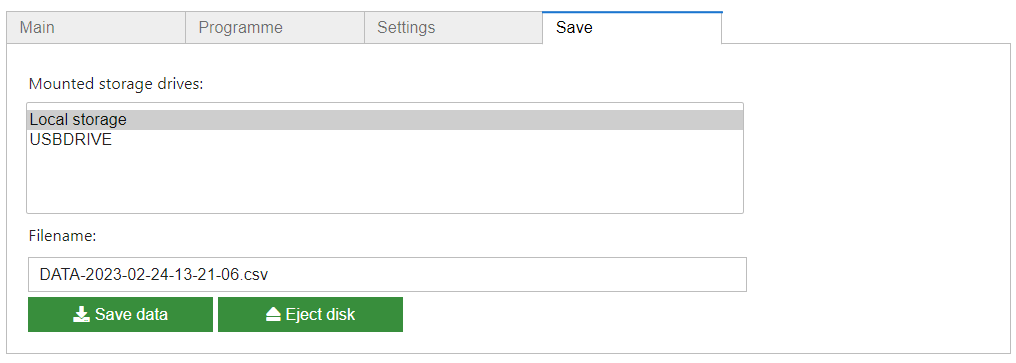
The export tab is used for saving temperature data after a heating run. When a heating run is finished, the recorded data is stored, after which the system will revert to the idle state. To save the recorded data of a run, the user should specify a filename and storage location in the export tab, and click the ‘Save data’ button